


WoodUbend 101
- Tracy Sayers Trombetta
- Aug 26, 2019
- 5 min read

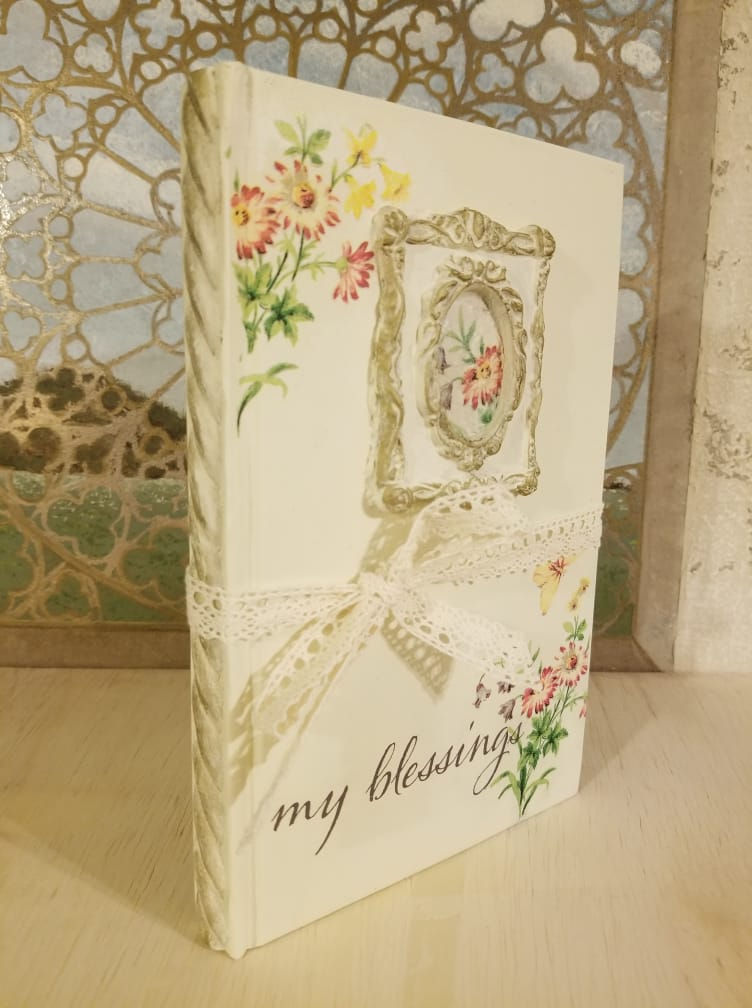
As you may know (or maybe not) - I am proud and lucky to have been named the USA ambassador for a marvelous product from England called WoodUbend. WoodUbend are heat bendable wood moldings and trims that allow artists and DIYers a quick and simple method for decoration of furniture, objet d’art, glassware, and many other everyday items. My blog post today is going to be a step by step tutorial that our FABULOUS stockists around the world can use to teach a basic class on how to manipulate and apply the moldings to make an adorable little sign just like this:

To start this project you will need the following supplies for each student:
Either a piece of wood or a plaque that will be your base. If you would like to use the same base as in this picture -(10.4x 7 inches) there is a limited supply (and a few other plaques to choose from) here: https://www.tracysayerstrombetta.com/decoupage-supplies
A woodUbend applique. The plaque pictured is design # 1245 but there are MANY WoodUbend designs to choose from. Over 300 designs are available as of Aug 2019!! If you need some woodUbend moldings (everybody needs some woodUbend moldings......) and you're in the USA you can order some at https://www.tracysayerstrombetta.com/wood-ubend-moldings-appliques If you're somewhere else in the world, go to www.woodubend.com to find your nearest stockist. If you are a woodUbend retailer teaching a class - be sure your students know how they can buy from you!! I always give students a 10% discount - just on the day they take a class. It's a nice little surprise for everyone.
A rub on transfer. The one I used is 6x6 inches and can be purchased here: https://www.tracysayerstrombetta.com/decoupage-supplies I'll have more decals available on the website soon.
You will also need shared class supplies of:
A good quality wood glue
Diaper wipes or paper towels
Scissors
Some painters tape
Sandpaper
A few spoons (or something to rub the transfer off with)
A hair dryer or heat gun for every 2-3 students OR one electric griddle
Paint (your choice of brand) and paintbrushes
A clear top coat (optional)
Once you have all of the supplies gathered you are READY TO BEND!!
The first thing you might want to do is show your students this little video. It's just a quick overview of what they'll be doing in class:
This is so easy - you're going to love it......
Step #1 Pick your WoodUbend! For a group class you can give everyone the same design, they can choose one from a selection OR (this is the fun part) - this is a perfect project for what we call "broken bits" WoodUbends are flexible when warm but will snap/break when cool. Stockists will also have pieces and ends from projects they have completed. Just put a bunch of "broken bits" out and let folks choose their own designs! For my plaque I used one of the pieces of #1245 (it's a pair) and broke it in half.

Step #2 Using a hair dryer, heat gun or griddle, warm the woodUbend moldings to make them pliable. The heat of regular hair dryer is more than enough to soften most of the designs. (Some of the very thick ones need to be warmed more) Go ahead. Warm some up and give them a little bend. You can use scissors or a knife to cut the woodUbend to the size you need. It really is that easy.....

Step #3 Apply wood glue to the back of your woodUbend piece and press it on wherever you would like on your plaque/wood. (Remember to leave space for the rub on transfer) Remove any excess with a wet wipe or damp paper towel. Be sure and tell your students that with a good quality wood glue, woodUbend appliques can be adhered to wood, mdf, metal, art canvases, glass, metal (and probably a few other things I haven't tried yet). The possibilities are just endless!!! (I'm not even exaggerating.......)

Step #4 Once you have the woodUbend glued to the plaque - go ahead and warm it up again. There is something about this step that makes the woodUbend moldings and the wood glue really fuse and adhere.
Step #5 - If you need to - use a knife to trim and sandpaper to smooth the edges of your woodUbend so they're flush with the edge of the plaque. Students will see that the woodUbends can be sanded just like any piece of wood!


Step #6 Once your plaque is ready - go ahead and trim your rub on transfer so that it will be flat on the surface of your plaque.

Step #7 You are now ready to paint your plaque and woodUbend! Remind students that woodUbend moldings can be painted with any brand of paint and can also be stained, glazed, waxed or pretty much any other technique you would use for refinishing furniture or creating art projects. If you would like to see some of the many tutorial videos and ideas on using woodUbend for some amazing projects - hop on over to the WoodUbend Mouldings Creations & Upcycling Facebook Page (I promise I didn't misspell that by the way - in England they spell it with a U. You might be amazed how many people have tried to correct my spelling......) https://www.facebook.com/groups/2064778693545798/


Step #8 Use a bit of painters tape to secure the transfer and keep it from moving - then (using the back of a spoon, a coin, a credit card - really whatever you might have handy - rub the letters until you see them leaving the paper and adhering to the painted surface. Here are a couple of pictures so you can see - the "gray" happens when the transfer is working. You can pick up an edge and peek but be sure to put it back in the exact same place. It's not hard but it does take a while. Be patient and keep rubbing!!!!


Once you have all of your letters rubbed on - Step #9 is optional. I went ahead and put a clear top coat over the entire plaque just for durability.

And you are DONE!!!! Wasn't that easy???

Now tell your students to get some woodUbend moldings so they can take them home and play with them!!! No seriously - they are an amazing way to transform plain furniture and add detail and character to so many things. Picture frames, vases, boxes, trays - all of those things you've been meaning to paint and upcycle lol.
Stay tuned for the next class - WoodUbend 102 will be how to use woodUbend on curved surfaces. You will need an empty wine bottle (perfect excuse to have some wine, right?) to create something like this:
I hope you've enjoyed this project and will visit again for the next blog post! I also hope it will be helpful for newbie woodUbenders and for any woodUbend stockists that are planning their first class. If you haven't visited yet - please visit my website at www.tracysayerstrombetta.com. You are also more than welcome to join me on my Facebook artist page https://www.facebook.com/thepaintingladytracysayerstrombetta/ and you'll find me on Instagram as #trombettamomma
And so we come to the end of my blog. If you've stuck with me until this part - THANK YOU!! I would appreciate any feedback and comments as I'm planning to do this regularly and would like to have a happy bunch of customers and followers. Take care and have a great day!!I
Tracy


Very Nice!
A pattern is a regularity in the world, in human-made design, or in abstract ideas.
WoodUbend is a revolutionary and unique type of decorative molding. It can be drilled, sanded, glued, painted, stained, varnished, or distressed. It is a very beautiful design. Which thinks is a very important pattern country. A geometric pattern is a kind of pattern formed of geometric shapes and typically repeated like a wallpaper design.
Thank you for your great post.
https://www.homeanalyst.net